PagerDuty#
The PagerDuty node allows you to automate work in PagerDuty, and integrate PagerDuty with other applications. n8n has built-in support for a wide range of PagerDuty features, including creating incident notes, as well as updating, and getting all log entries and users.
On this page, you'll find a list of operations the PagerDuty node supports and links to more resources.
Credentials
Refer to PagerDuty credentials for guidance on setting up authentication.
Examples and templates
For usage examples and templates to help you get started, take a look at n8n's PagerDuty integrations list.
Basic Operations#
- Incident
- Create an incident
- Get an incident
- Get all incidents
- Update an incident
- Incident Note
- Create an incident note
- Get all incident's notes
- Log Entry
- Get a log entry
- Get all log entries
- User
- Get a user
Example Usage#
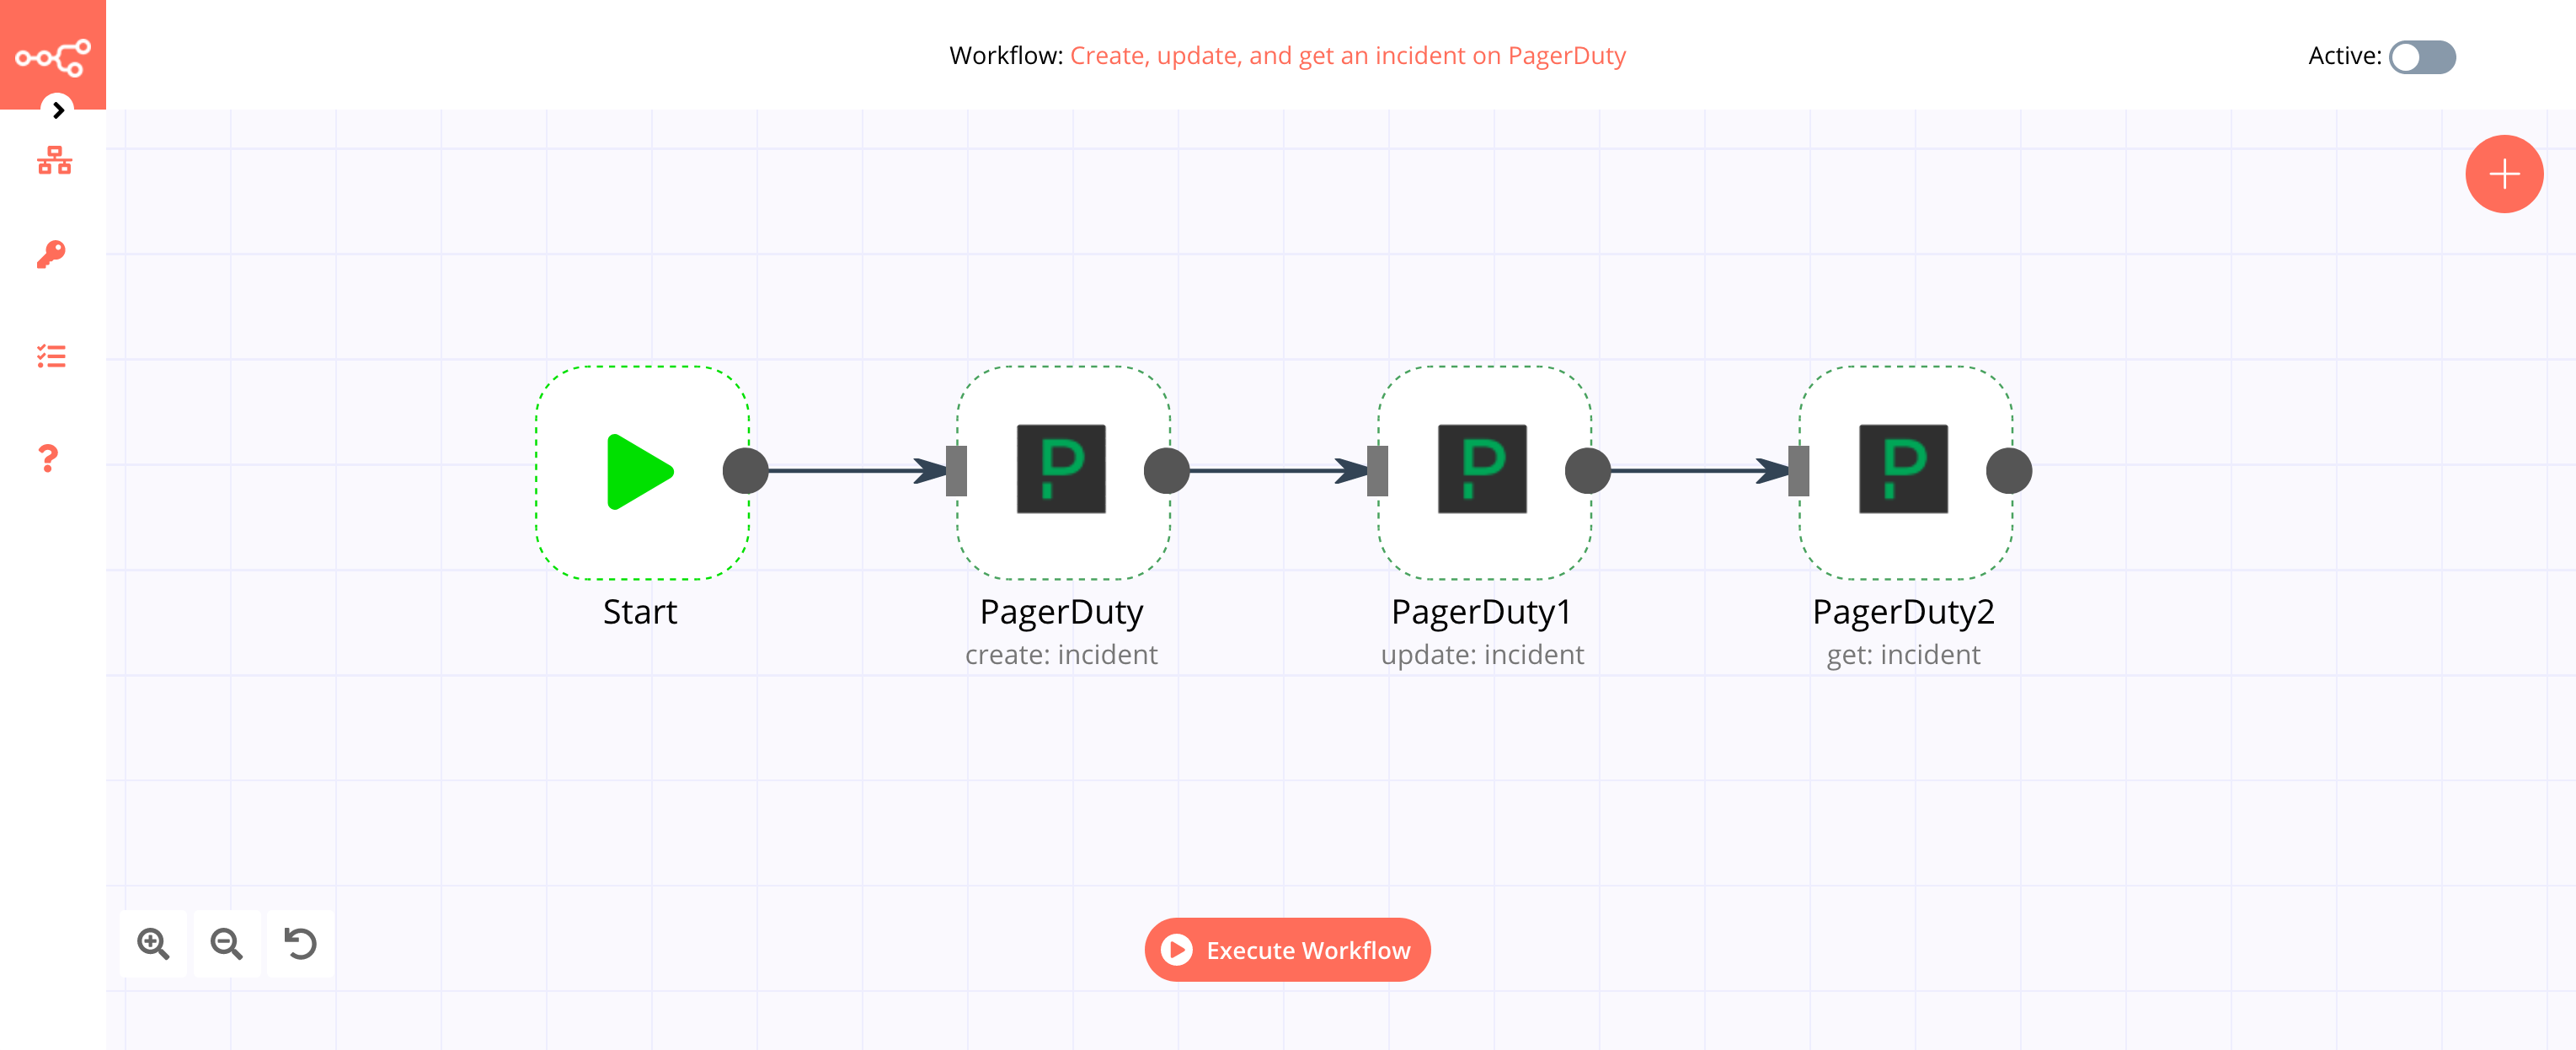
This workflow allows you to create, update, and get an incident on PagerDuty. You can also find the workflow on n8n.io. This example usage workflow would use the following nodes. - Start - PagerDuty
The final workflow should look like the following image.
1. Start node#
The start node exists by default when you create a new workflow.
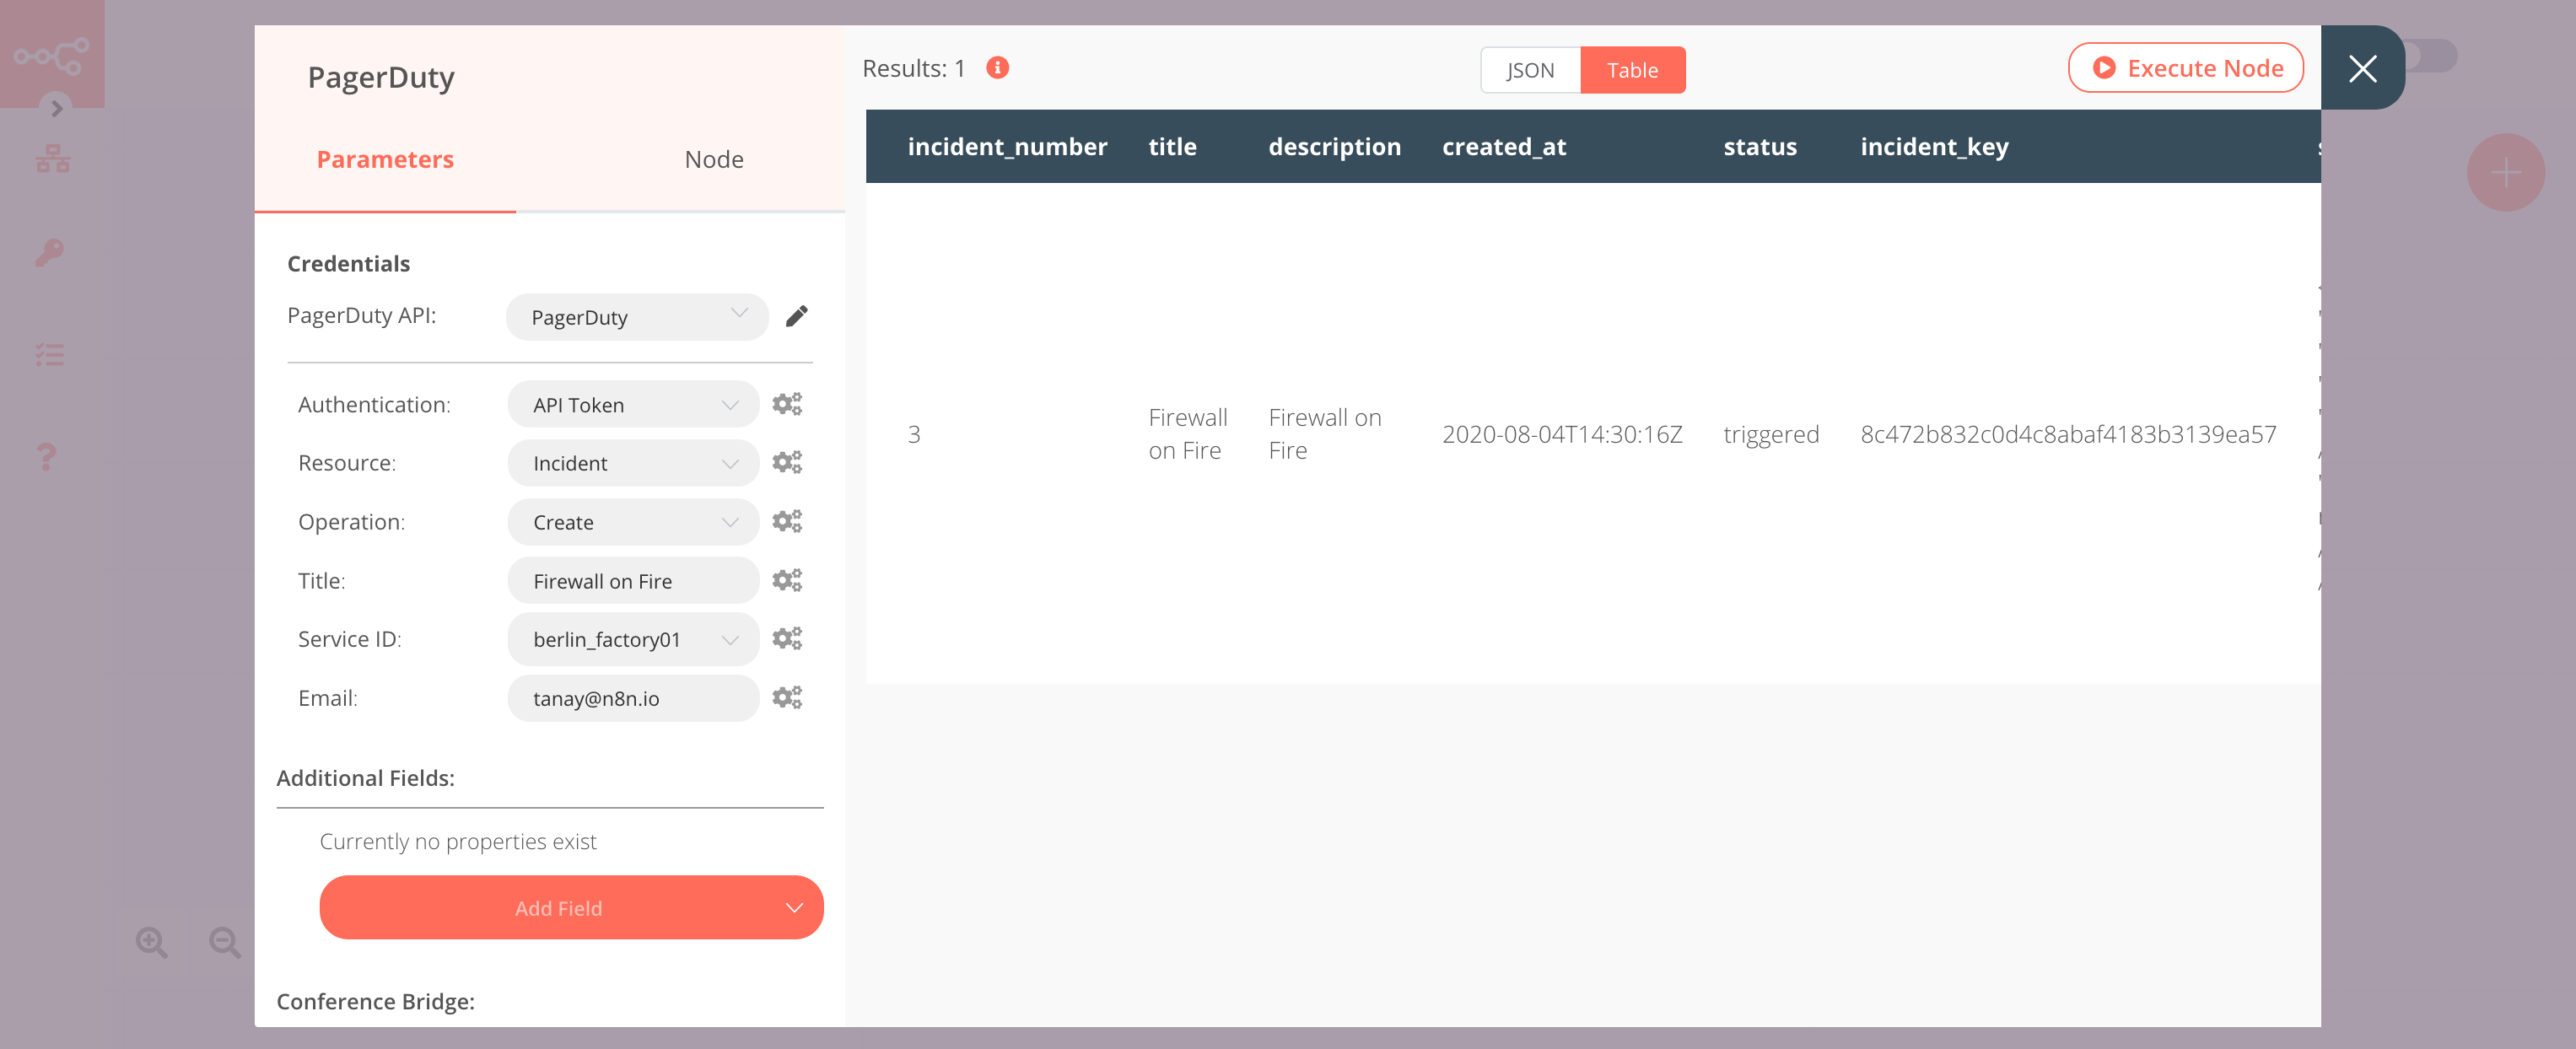
2. PagerDuty node (create: incident)#
- First of all, you'll have to enter credentials for the PagerDuty node. You can find out how to do that here.
- Enter the title of the incident in the Title field.
- Select the Service ID from the dropdown list.
- Enter your email in the Email field.
- Click on Execute Node to run the node.
3. PagerDuty1 node (update: incident)#
- Select the credentials that you entered in the previous node.
- Select 'Update' from the Operation dropdown list.
- Click on the gears icon next to the Incident ID field and click on Add Expression.
- Select the following in the Variable Selector section: Nodes > PagerDuty > Output Data > JSON > id. You can also add the following expression:
{{$node["PagerDuty"].json["id"]}}. - Click on the gears icon next to the Email field and click on Add Expression.
- Select the following in the Variable Selector section: Nodes > PagerDuty > Parameters > email. You can also add the following expression:
{{$node["PagerDuty"].parameter["email"]}}. - Click on the Add Field button and click on Title.
- Enter the name of the updated title in the Title field.
- Click on Execute Node to run the node.

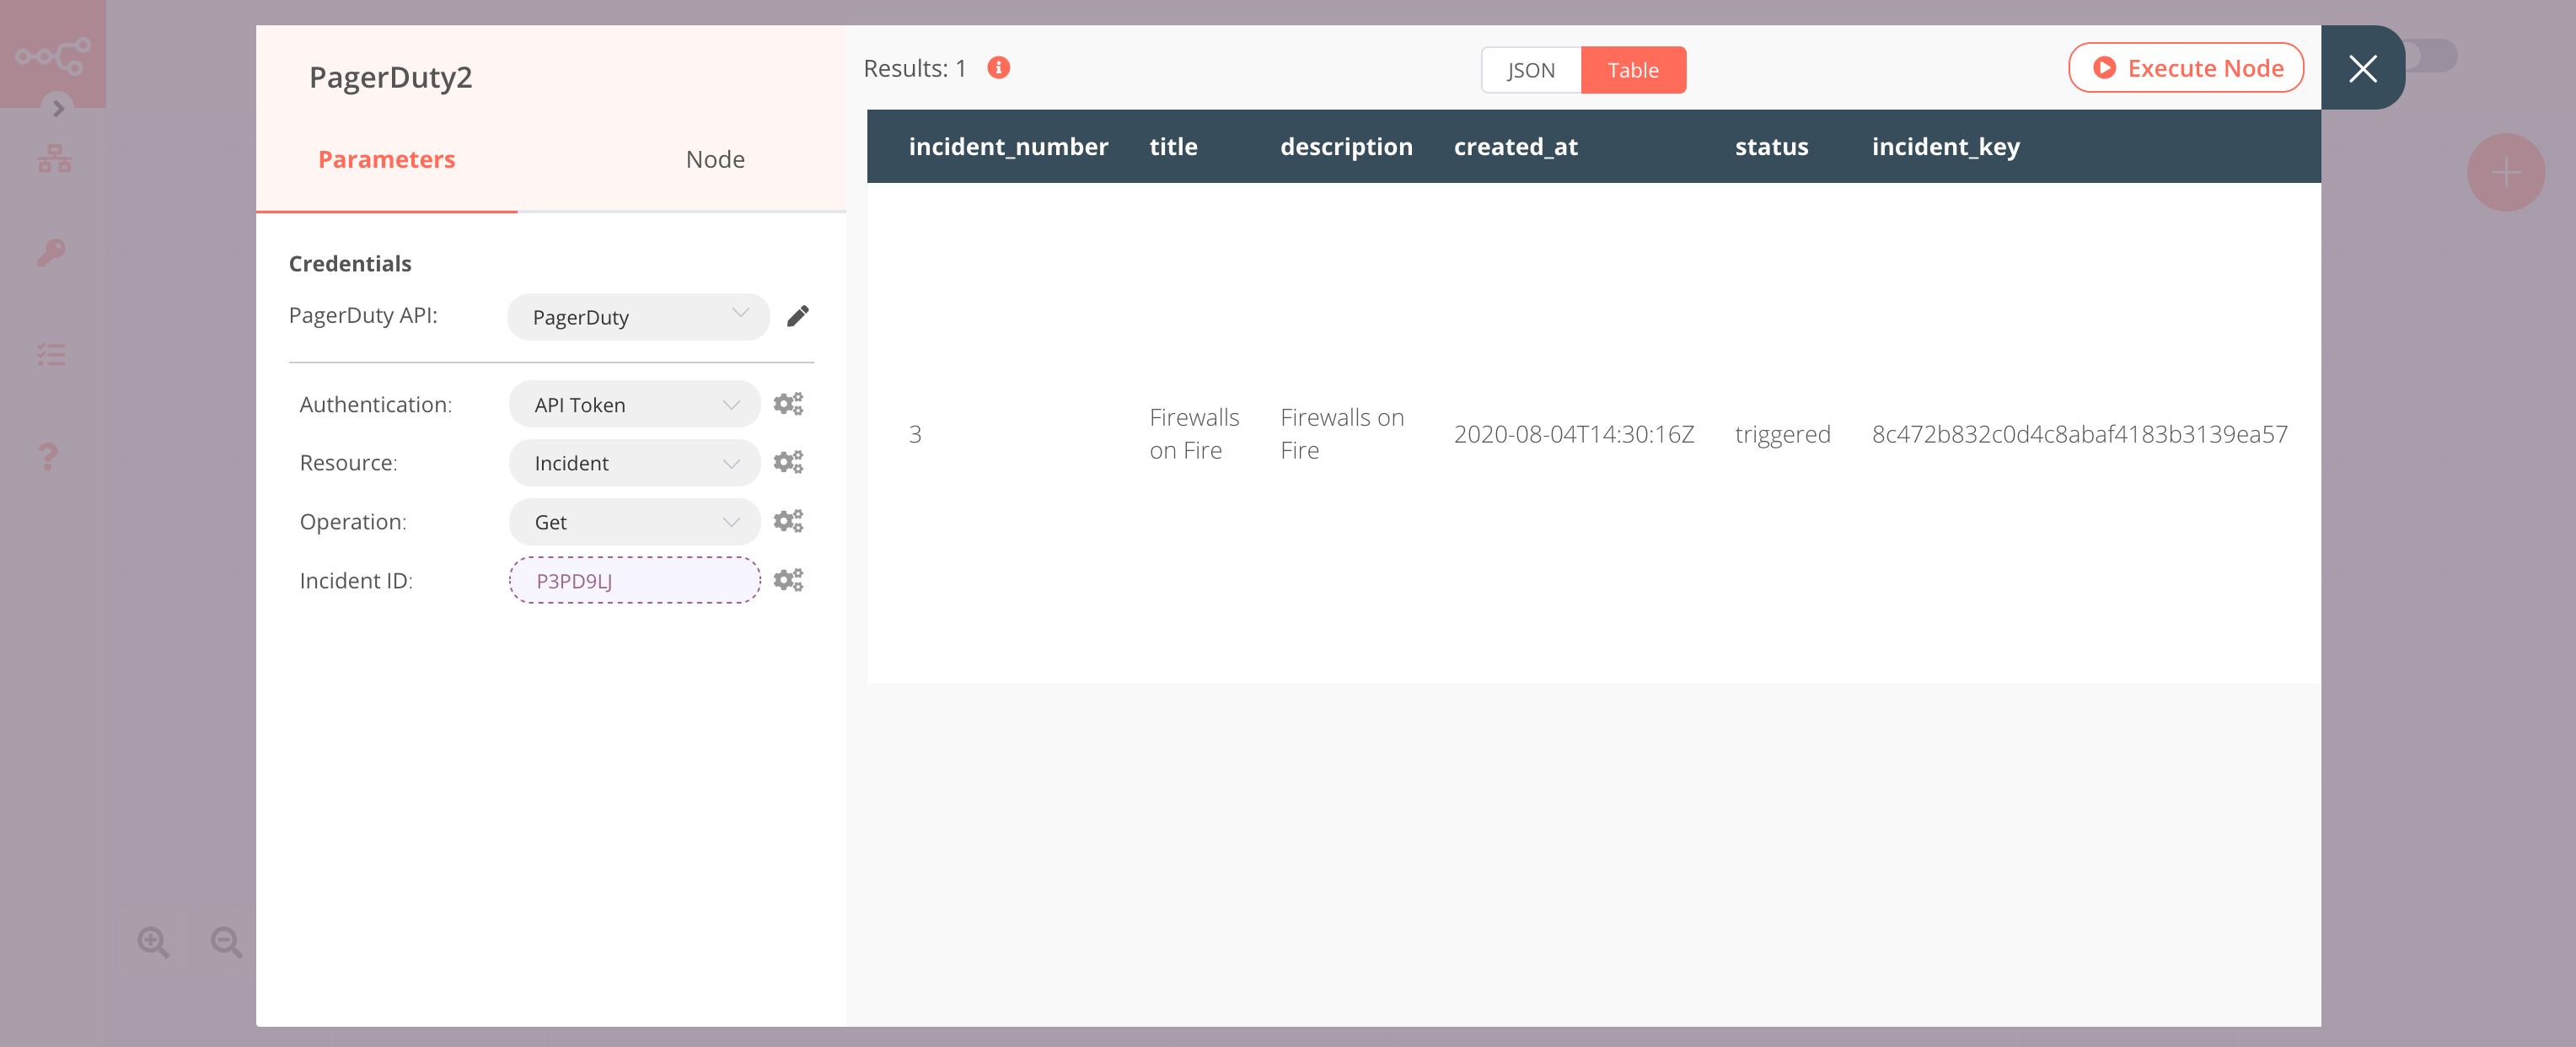
4. PagerDuty2 node (get: incident)#
- Select the credentials that you entered in the previous node.
- Select 'Get' from the Operation dropdown list.
- Click on the gears icon next to the Incident ID field and click on Add Expression.
- Select the following in the Variable Selector section: Nodes > PagerDuty > Output Data > JSON > id. You can also add the following expression:
{{$node["PagerDuty"].json["id"]}}. - Click on Execute Node to run the node.